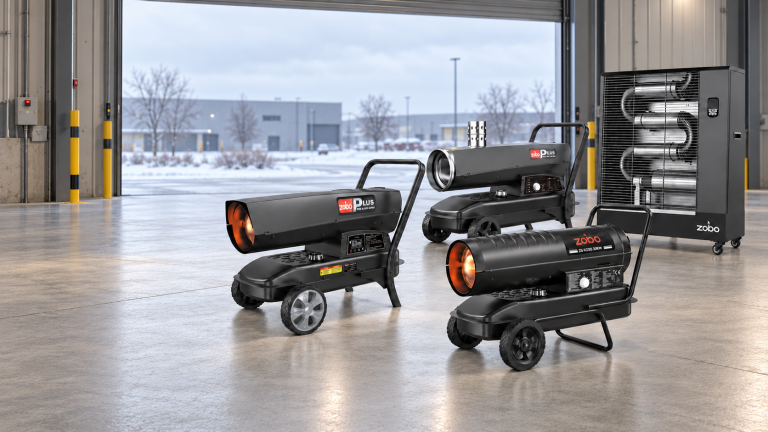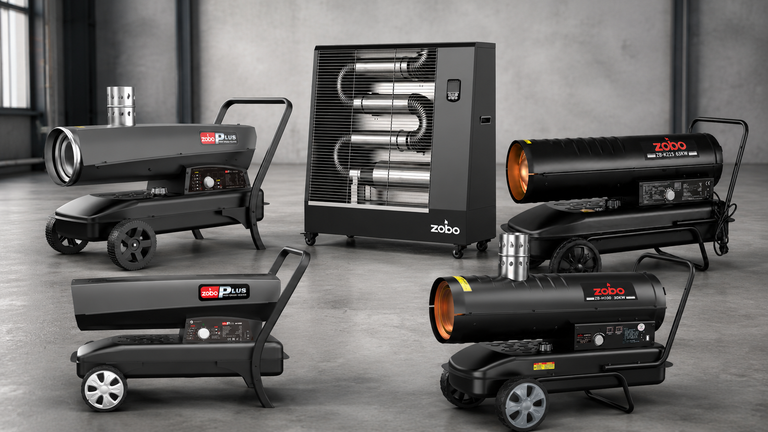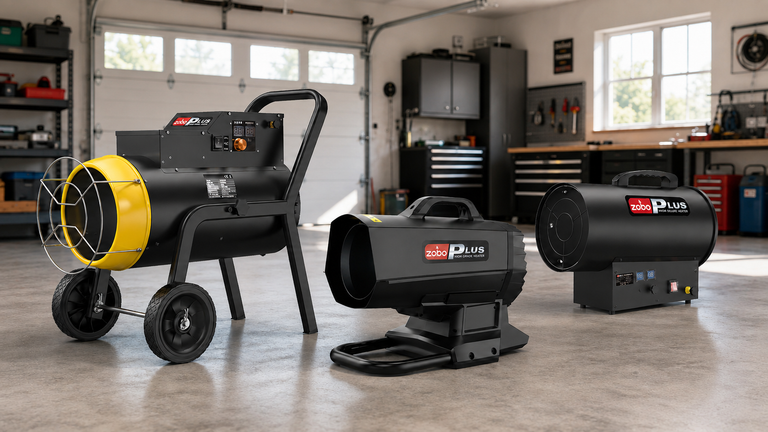

China Diesel Heater Error Codes E1 E2 E3 Troubleshooting,diesel kerosene heater not working
Forced-air diesel heaters and forced-air kerosene heaters are used in workshops, warehouses, construction sites, farms, garages, greenhouses, and many other industrial or commercial facilities to provide quick response and high-output heating.
If your diesel kerosene heater not working, it may display an E1, E2, or E3 error codes. The trouble code allows users and technicians to identify the general location of the area of the heater that should be tested.
Errors do not always indicate the heater is seriously damaged. A forced-air heater may stop working and enter a fault-protection mode for many reasons including an empty fuel tank, incorrect pump pressure, loose cables, buildup of carbon on the ignition electrode tip, blocked fuel filter, dirty injector, or disconnected sensor.
China diesel heater error codes E1 E2 E3 troubleshooting guide details the most common reasons why zobo diesel/kerosene air heater displays E1, E2, and E3 codes and explains how to repair the heater.
Safety Notice:
When inspecting or repairing any part of a diesel air heater:
Turn off the power switch and disconnect the power plug.
Allow the heater to cool before opening the combustion chamber and heater body.
Keep the heater away from open flames, sparks, cigarettes, or other smoking materials.
Ensure work areas are clean and well ventilated.
Do not open fuel lines while the heater is powered on.
Avoid contact with the ignition system if the heater is plugged into an electrical outlet.
Always use replacement parts that are compatible with the heater’s model and rated voltage.
Repair manuals for forced-air heaters emphasize that service should not be performed on a hot heater or while it is connected to power. The fuel filter, nozzle, photocell, ignition parts, pump pressure, and many other components should be maintained in accordance with heater model specifications.
Many of the electrical tests listed in this article use 110V or 220V power and involve high-voltage ignition systems. An experienced electrician or trained service technician should only perform electrical diagnostic procedures.
Error code meaning can change between different heater models and manufacturers. This troubleshooting guide covers the zobo forced-air diesel/kerosene heater models using the error definitions listed below. Before proceeding, review the operating instructions supplied with the specific heater.
If you would like to refer to a detailed video breakdown, please click here.
China Zobo Diesel Kerosene Heater Error Codes E1 Error Causes and Solutions
Fuel delivery, ignition, combustion, and flame detection issues are the most common causes of an E1 shutdown.
The engine needs to rotate the motor and fan, build air pressure, pull the fuel from the tank through the fuel filter, atomize the fuel with the injector, create a spark with the ignition electrode, ignite the fuel-and-air mixture, detect the flame with the photoresistor, and complete several other steps in rapid succession.
If there is a problem with fuel delivery, if the electrode does not produce a spark, if the flame fails to burn correctly, or if the photoresistor cannot detect the flame for any reason, the heater may shut off and display the E1 error.
User manuals for other forced-air kerosene heaters also mention an empty fuel tank, incorrect pump pressure, blocked fuel filter, blocked nozzle, ignition system fault, loose electrical connections, photo-cell issues, and other issues as possible causes of an E1 error codes.
Check the Fuel-Level Gauge
Verify there is enough clean fuel in the tank before troubleshooting other components.
On most fuel gauges:
E = Empty
F = Full
If the needle is near E, add fresh fuel that is approved for use in the heater. Fill the tank about one-third full when troubleshooting the E1 error code. The fuel tank on most models does not need to be full to diagnose or repair the error.
Running the heater with a very low fuel level can draw air into the fuel line. When air enters the fuel line, the fuel pump cannot deliver a stable flow of fuel to the injector. The fan and motor may operate normally but the heater will not ignite properly.
Inspect the fuel for evidence of water, dust, rust, or other contaminants.
Dirty fuel can cause:
Ignition failure
Weak combustion
Injector nozzle blockage
Fuel filter blockage
Excessive smoke
Repetitive E1 error codes
Adding the wrong type of fuel by accident is possible if multiple fuels are stored in the same area. Consult the label on the heater or refer to the user manual to determine which fuels are approved for use.
Only use diesel or kerosene approved for use with the heater. Do not mix fuels unless you know exactly what type of fuel is in each container.
Check the Air-Pressure Gauge
Fuel needs to be drawn from the tank and pushed through the injector nozzle at the correct air pressure.
If the pressure gauge indicates low or high pressure, adjust the pump system to produce stronger or weaker pressure. The pump pressure cannot produce the correct air/fuel mixture if it is set too high or too low.
Turn the power off and watch the pressure gauge closely when restarting the heater.
For models covered by this troubleshooting guide:
Clockwise = Increase Pressure
Counterclockwise = Decrease Pressure
Other heater manufacturers use this same adjustment direction on their pump systems. However, each heater model has a different recommended pressure setting.
Begin by turning the adjustment screw a few turns in either direction. Then observe the pressure gauge to confirm the pressure is moving in the correct direction.
Do not assume your heater requires the same fuel pressure as another brand or model. Compare the heater model numbers and verify both heaters are the same size. For example, a 20 kW heater will not have the same fuel pressure as a 70 kW heater.
Fuel pressure that is too low can cause:
Weak or interrupted fuel delivery
Poor fuel atomization
Delayed ignition or failure to ignite
Flame failure
E1 error codes
Fuel pressure that is too high can cause:
Excessive amounts of fuel delivered to the burner head
Large amounts of smoke
Build up of soot inside the heater
Weak flame
Fuel odor during operation
Fire hazard
Burner overheating
Get help from a qualified technician if pump pressure will not adjust. Problems with the pump, pump rotor, air filters, end cover, seals, and air lines can prevent proper pressurization.
Check for Sparking on the Ignition Electrode
Perform a visual inspection of the ignition electrode if the fuel tank is near full and the air pressure appears to be normal.
The ignition electrode can also be referred to as the ignition needle, spark electrode, or spark plug.
A certified heater installer can remove the side panel and disconnect the upper cover to visually observe the electrode during the startup cycle.
If strong spark appears on the electrode tip during startup, the ignition electrode is usually operating normally.
If there is no spark or only a very weak spark, a fault exists within the electrode itself, the electrode wiring, high-voltage ignition transformer, grounding connection, or control circuit board.
Inspect the two wires that connect to the ignition transformer. Verify both wires are connected and there are no obvious issues with the wiring. Look for signs of:
Loose terminal screws
Disconnected plugs
Damaged wire insulation
Burnt connectors
Corrosion
Broken wires
Bad grounding or failed connections
Secure any loose connections before testing the heater again. Checking and re-connecting the two ignition wires is also recommended in many troubleshooting manuals before replacing the transformer or control board.
Never touch the electrode tip, ignition transformer, or ignition wires when the heater is connected to power. Failure to avoid these high-voltage components can cause serious injury.
Remove and Clean the Ignition Electrode
Ignition electrodes can be removed from some heaters for closer inspection. Continue with this step if there is no spark but both ignition wires are securely attached.
Carbon deposits from incomplete combustion can build up on the electrode tip and interfere with spark production. Dark grey, black, or oily materials on the electrode tip are usually carbon buildup.
Unplug the heater and allow it cool before beginning. Remove the side panel and detach the upper cover from the heater housing.
Disconnect the ignition wire from the ignition electrode.
Remove the electrode from the heater. Electrode removal procedures vary from heater to heater. Consult the instruction manual or reference the exploded view diagram if necessary.
Inspect the electrode for signs of wear. Carefully rub away carbon deposits using fine sandpaper. Do not press down firmly when cleaning the electrode.
Weak electrodes can produce weak sparks. Electrodes that are broken, cracked, or severely worn should be replaced with a new part.
Check the gap between the electrode and center electrode after cleaning. Applying too much pressure can cause the ceramic insulation to crack and create a short.
The required electrode gap varies by heater model. Compare the gap to the specification listed in the zobo operating manual or service manual. Other heater manuals require a smaller electrode gap for different models.
Replace the ignition electrode if it is damaged, cracked, worn too thin, or covered in corrosion.
Test High-Voltage Ignition Coil or Transformer
Weak electrodes can also produce weak sparks. If the ignition electrode appears normal but there is no spark, the ignition transformer may require testing.
Caution: Verify the heater is designed for use with 110V power or 220V power. Only experienced technicians should attempt voltage testing.
Most heaters sold in North America operate using around 110–120 volts.
Most heaters sold in Europe and other regions outside North America use around 220–240 volts.
Electricians or qualified technicians may disconnect the ignition-coil input wire and verify the ignition transformer is producing high voltage by applying the correct independent power supply to the two terminals.
Use a 110V test supply to test heaters that require 110 volts only.
Use a 220V test supply to test heaters that require 220 volts only.
Simply applying the correct voltage will not always prove the ignition transformer is functional. Verify whether a spark appears on the ignition electrode when applying power.
If the electrode produces a spark when power is applied to the ignition transformer, the ignition transformer and electrode are operating normally. A defect may exist with the control board, output wires, or another circuit.
If there is still no spark after applying power to the transformer, the ignition transformer or assembly may be faulty.
Never connect 110 volts to a heater that requires 220 volts. Check the manufacturer markings on the transformer to verify the required input voltage.
Consult or label on the wires themselves. Do not assume a heater requires 110 or 220 volts based on wire colors or appearance.
Warning: Ignition coils and transformers can store dangerous voltages. This test procedure should only be completed by a qualified electrician or experienced technician.
Incorrect voltage testing can damage the ignition transformer, cause electrical shock, start a fire, and destroy the control circuit board.
Check the Photoresistor or Flame Sensor
The flame sensor should detect the burner flame shortly after ignition. Failure to detect a flame can cause the control board to shut off the heater and display E1.
Photoresistors are sometimes referred to as photocells, flame sensors, flame detectors, flame relays, or optical sensors.
Disconnect the photoresistor and inspect the sensor or holder after allowing the heater to cool. Reconnect the photoresistor and ensure all of the following are correct:
The photoresistor connector is fully inserted into its socket.
The wires are not loose or damaged.
The sensor is properly seated in its holder.
Air flow from the fan is not blowing directly onto the sensor.
The sensor is clean and free from dirt.
Sensor wires have not been burned or damaged during operation.
Reconnect the photoresistor if it is loose or disconnected. This fault often causes an E1 error even after the heater has ignited.
Sensor lenses can be gently cleaned with a clean cotton swab or cotton ball. Visible lens damage is not always apparent, but some foreign materials may be difficult to remove from the lens surface.
Do not scratch the lens surface when cleaning. Replace the photoresistor or flame sensor if the lens is clean but the sensor cannot detect the flame.
Inspect Heater Fuel Line and Air Line
Blocked fuel lines or air lines can also cause airflow problems that lead to an E1 error code.
Visually inspect the fuel line and air line that connect the fuel pump to the burner assembly.
Potential problems include loose connections, cracks in the hose, hardened fuel lines, bent air lines, heat damage, improper routing, leaking fuel, or leaking air.
Disconnected or damaged air lines can prevent the injector from drawing and atomizing fuel. Fuel lines that come loose or are partially blocked can disrupt fuel delivery.
Parts of the fuel line and air line may need to be removed to inspect fittings and connections. Reconnect any loose fittings and replace damaged sections of hose with the correct size and type.
Fuel lines and air lines should not be repaired using generic glue or tape. Tape and glue can fail during operation and cause messy leaks.
Check and Clean Fuel Filter
Blocked fuel filters are a common cause of ignition failure or slow ignition times.
Symptoms of a dirty fuel filter include:
Motor starts but heater does not ignite.
Heater successfully ignites then stops shortly after.
Flame appears weak or stops after beginning.
Heating output seems low or seems blocked.
Repeated E1 error codes appear.
Disconnect the fuel line using needle nose pliers and remove the fuel filter from the fuel line.
You may need to allow fuel to drain back into the tank before reinstalling the filter.
Clean the fuel filter using clean fuel approved for the heater or an approved cleaning solution. Allow any cleaner to fully drain before reinstalling the filter.
Some heaters recommend cleaning the fuel filter with clean kerosene rather than water. Dispose of wash water or used kerosene in accordance with local laws.
Install the filter and secure the fuel line connector. Replace fuel filters that are damaged, cracked, blocked, or do not appear to clean properly.
Remove and Clean Injector
Fuel must be drawn through the fuel injector. Blocked injectors can prevent normal ignition and cause heater errors.
Clean the injector using these basic steps:
Unplug the heater and allow it to cool completely.
Disconnect the upper cover.
Remove burner-head screws using a Phillips screwdriver.
Disconnect the fuel line and air line using needle-nose pliers.
Turn the double-hole nozzle counterclockwise until it stops.
Unscrew the injector by turning it counterclockwise.
Use the correct size open-end wrench to remove the injector.
Inspect the injector for dirt or small particles that may be blocking fuel flow through the injector.
Use a proper cleaner to remove contamination from the outside of the injector. Do not attempt to enlarge the injector hole or ignition path.
Disconnecting the nozzle and injector allows access to the internal parts of most heater injectors.
Remove the restriction plate. Cleaning solutions and fuel approved for use with the heater can be applied to the internal parts of the injector.
Use a small brush to gently scrub away carbon and other black debris.
Inspect and gently clean the small nozzle inside the injector. Reinstall all components in the reverse order of removal.
Some manufacturers recommend soaking the nozzle in clean kerosene to loosen contaminants. Other manuals suggest blowing compressed air through the nozzle to remove debris.
Make sure the fuel and air lines are reconnected in the proper locations before testing the heater. Reversing the lines will prevent the heater from igniting properly.
Check Whether Motor is Stuck or Jammed
Blocked fuel lines can prevent normal ignition by starving the burner head of fuel. Air lines that are disconnected or become partially blocked can also prevent normal ignition.
If the heater fan does not spin freely or the pump does not operate correctly, normal ignition pressure will not be achieved.
Disconnect the power plug and inspect the fan and pump motor.
Some common issues include:
Objects blocking the fan blades.
Bent fan blades.
Excessive dust blocking the fan from spinning.
Pump rotor that will not spin freely.
Damaged pump bearings.
Fan touching other components inside the heater.
Fan or pump motor is very hot after the heater shuts off.
Fan rotation should be smooth and without significant resistance.
Plug in the heater and briefly turn it on to confirm the motor spins at normal speeds.
Turn off the heater if:
Only a humming sound is heard from the motor.
The motor spins very slowly.
The motor suddenly stops spinning.
Noise is coming from the motor.
The motor vibrates violently.
You smell an odor that resembles burning plastic or electrical wire.
The motor, capacitor, pump rotor, wires, or control board may need replacement. Consult a technician for additional assistance.
Check Heater Ventilation and Oxygen Levels
Blocked airflow or poor combustion air can cause unstable combustion and other failures.
Confirm the heater has enough room to pull in fresh air. Normal heating operation produces exhaust gases that must be diluted with outside air.
Visible warning signs include:
Heater rear air inlet is blocked.
The heater is installed too close to wall or other obstruction.
Packaging, dust, or other materials covering the heater inlet.
Heater placed in a room with no outside air circulation.
Flammable exhaust gases building up inside the heated area.
Open a window or door to improve ventilation if needed.
Diesel heaters and kerosene heaters are direct-fired heaters that consume oxygen and emit combustion gases into the space being heated.
Failure to provide enough oxygen can cause heaters to fail or produce unsafe levels of carbon monoxide in occupied rooms.
Heaters must always be used in accordance with the product manual and all local safety standards. Do not use any direct-fired fuel heater inside a completely sealed occupied room.
Use a carbon monoxide detector where required by local regulations or recommended by your site-safety policies.
Summary of Troubleshooting Steps for E1 Error Codes
Consult the following E1 troubleshooting guide beginning with step 1. If the first step does not correct the problem or identify the cause of the fault, proceed to the next step.
Check fuel level
Check fuel quality
Restart heater and check error code
Check pressure reading on air-pressure gauge
Inspect ignition wires and connectors
Inspect and clean ignition electrode
Disconnect and clean photoresistor connector
Inspect fuel lines and air lines for blockage or damage
Clean fuel filter
Clean injector nozzle
Inspect heater motor and fan
If unsure about ventilation, improve airflow into heated room
Have a technician test the transformer and control board (optional step)
Contact technical support when required
Checking fuel level and quality are two easy steps that resolve many failed ignition attempts. Testing electrical components and replacing parts should only be necessary after mechanical causes have been ruled out.
China Diesel Kerosene Heater Error Codes E2 Causes and Solutions
Heaters that use the E2 error codes report a fault related to the heater’s wind sensor. Wind sensors are also commonly called airflow sensors by other brands.
Electrical problems with the sensor or its connection cable are often the cause.
Most failures are caused by one of these two issues:
Wind-sensor connection cable is misaligned or not inserted all the way.
Wind sensor is damaged or faulty.
Restart the heater and see if the error code disappears. Allow the heater to cool down if it has been running.
E2 Troubleshooting Tips
Disconnect the power and allow the heater to cool before inspecting the wind sensor.
Locate the sensor and check it carefully. Compare the connector to the following photos and ensure:
Plug is fully inserted.
Locking tab is engaged.
Connections do not appear loose.
Terminal pins are not bent.
Wire is not broken.
No damage is visible on the cable.
Fan rotates smoothly when power is applied.
Disconnect and reconnect the sensor connector. Ensure the connector is installed in the correct orientation.
Plug in the heater and restart it to see if the E2 error codescontinues to display.
If the error still appears, carefully check wind sensor wires for continuity using a multimeter. Consult a technician to test or replace the wind sensor if electrical connections are intact but the control board fails to sense airflow.
Never bypass a wind sensor or airflow sensor on any heater. Skipping this test may cause the heater to operate uncontrollably if the sensor is part of the airflow protection system.
Kerosene Heater Error Codes E3 Causes and Solutions
On models covered by this guide, an E3 error codesusually means there is a problem with the thermostat or temperature-control sensor.
Troubleshooting problems related to temperature control are often a simple repair. Heater technicians commonly find one of these problems:
Thermostat cable was partially inserted.
One of the two internal thermostat cables is loose.
Internal wiring became damaged.
Thermostat needs replacement.
Control board failed to sense the correct signal from thermostat.
Fixing an E3 Error on zobo Heaters
Turn off the heater and unplug it. Allow the heater to cool before opening the side panel.
Inspect the external thermostat connection closely. Disconnect and firmly reconnect all cables related to the thermostat.
Thermostat wires should not come loose under normal conditions. However, cables can become loose during heater transportation.
Carefully inspect wiring and connector terminals for signs of damage. Damage to sensor wiring or cables can cause an interruption in the thermostat signal.
Damage caused by rodents, overheating, or chemical spills are common causes of thermostat sensor failure.
Replace the thermostat if all connections are secure but the heater continues to report the same error codes.
Installation instructions for forced-air diesel and kerosene heaters also list a faulty thermostat switch as a possible reason for an E3 error codes.
Some electrical failures can mimic problems with physical components. Consult a technician when in doubt.
Thermostat wires should never be bypassed or permanently connected together. Heater temperature controls are an important safety feature.
Diesel Heater Maintenance to Prevent E1, E2, and E3 Error Codes
Completing heater maintenance on a regular schedule can help prevent failures and may prolong part life. Recommended maintenance includes:
Using only approved and clean fuel.
Cleaning the fuel filter during preseason inspections.
Maintain the injector annually or if ignition becomes slow and difficult.
Removing carbon from the electrode tip and maintaining the correct electrode gap.
Keeping the photoresistor lens clean and correctly positioned.
Checking heater hoses and connectors for damage or loose fittings.
Cleaning or replacing air filters and keeping fan blades free of dust.
Fuel filters should always be inspected before each heating season. Dust and dirt can easily contadimate fuel filters.
Air filters, fuel filters, and heater hoses can become loose over time. Regularly confirm all fittings are tightened to the correct specifications.
Some manufacturers recommend cleaning or replacing air filters every 200 hours or after continuous use with diesel fuel.
Fuel left inside the tank during offseason storage can go bad. Draining fuel and storing the heater in a dry area will reduce the chance of stale fuel causing ignition problems.
When is it best to contact technical support?
Stop using the heater and consult a certified heater installer or zobo technical support representative if:
Fuel leaks from the tank or other components.
Electrical wiring is burned or melting.
Control board appears damaged or does not operate.
The heater motor does not rotate.
Smoke appears during normal operation.
Flames appear outside of combustion chamber.
Pressure cannot be adjusted or if low pressure is normal.
Electrical fuses repeatedly blow.
Voltage testing is required to confirm whether the transformer is working.
You have cleaned and repaired connections, but the same error reappears.
Heater model does not have a wiring diagram or manual.